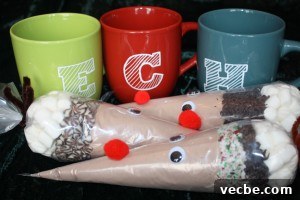
Making monogrammed mugs is a simple, creative DIY project that feels personal without requiring complicated tools or advanced crafting skills. These custom mugs are a lovely addition to homemade gifts, especially when paired with hot cocoa mix, tea, coffee, cookies, or another small treat. They also make thoughtful presents for teachers, friends, neighbours, coworkers, or anyone who enjoys a cozy drink in a mug made just for them.
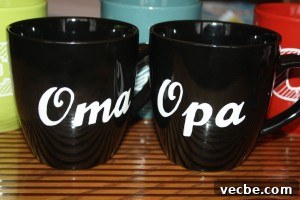
This project is especially fun because you can customize each mug with an initial, a short name, a meaningful word, or a simple design. With a printed template, a bit of homemade transfer paper, and a glass marker, you can create clean-looking lettering even if you do not feel confident drawing freehand. The finished result looks polished, personal, and handmade in the best way.
How To Make Monogrammed Mugs
Start by choosing the letter, word, or short phrase you want to add to your mug. For the best result, keep the design simple and easy to read. A bold font works well for initials because it creates a strong shape that is easy to trace and fill in. A script-style font can look beautiful for short words, but avoid anything too thin or detailed, especially if this is your first time making DIY monogram mugs.
Print your chosen letter or word in a size that fits nicely on the side of your mug. Before cutting anything out, hold the printed paper against the mug to check the scale. The design should be large enough to stand out but not so large that it wraps awkwardly around the curve of the mug.
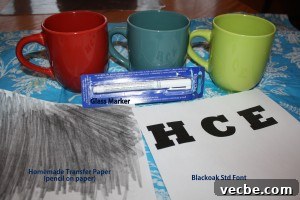
Gather your supplies before you begin. You will need a plain mug, a glass marker, tape, your printed letter or word, and transfer paper. If you do not have transfer paper, you can easily make your own with a regular sheet of paper and a pencil.
To make homemade transfer paper, shade one side of a plain sheet of paper heavily with a pencil. Cover an area slightly larger than the design you plan to transfer. The pencil graphite will act like transfer paper and leave a faint outline on the mug when you trace over the printed letter.
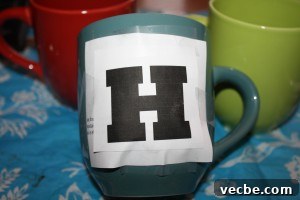
Cut out a piece of the pencilled transfer paper that is slightly larger than your printed letter or word. Then cut around the printed design so it fits comfortably on the mug. A simple square or rectangle shape is usually easiest to position and tape securely.
Place the transfer paper against the mug with the pencil-shaded side facing the mug. Position the printed letter or word on top, with the design facing outward toward you. Tape both layers firmly in place so they do not shift while you trace. Take a moment to make sure the letter is straight and centered before moving on.
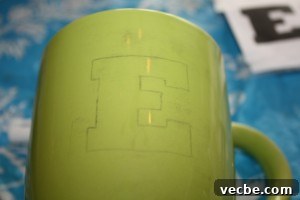
Using a pen, carefully trace the outline of the printed letter. Press firmly enough to transfer the graphite, but not so hard that the paper tears or slips. Once you have traced the full outline, gently remove the tape and paper. You should see a faint guide on the surface of the mug.
Now trace over the transferred outline with your glass marker. Work slowly and use steady strokes for the cleanest result. If you want a darker or bolder look, let the first layer dry for a few minutes, then go over the lines a second time.
After outlining the letter, you can decide how to finish the inside of the design. Fill it in completely for a bold monogram, add diagonal lines for a striped look, or decorate it with dots, small patterns, or extra colour. This is where you can make each mug unique while still keeping the overall design neat and stylish.
One of the best things about using glass markers is that the design is not permanent until it is baked. If you make a mistake or do not like the way something looks, simply wash it off and try again. This makes the project very forgiving, even for beginners.
When you are happy with your monogrammed mug design, allow the marker to rest for at least 4 hours, or leave it overnight if you have time. To set the paint, place the mug on a cookie sheet and bake it at 325 F for 30 minutes. After baking, let the mug cool completely before handling it. Once cooled, wipe it clean and your handmade mug is ready to use or gift.
For a finished gift, tie a pretty ribbon around the mug and tuck in a small treat, a packet of tea, coffee, or homemade hot cocoa mix. A personalized mug is practical, charming, and easy to customize for any occasion.