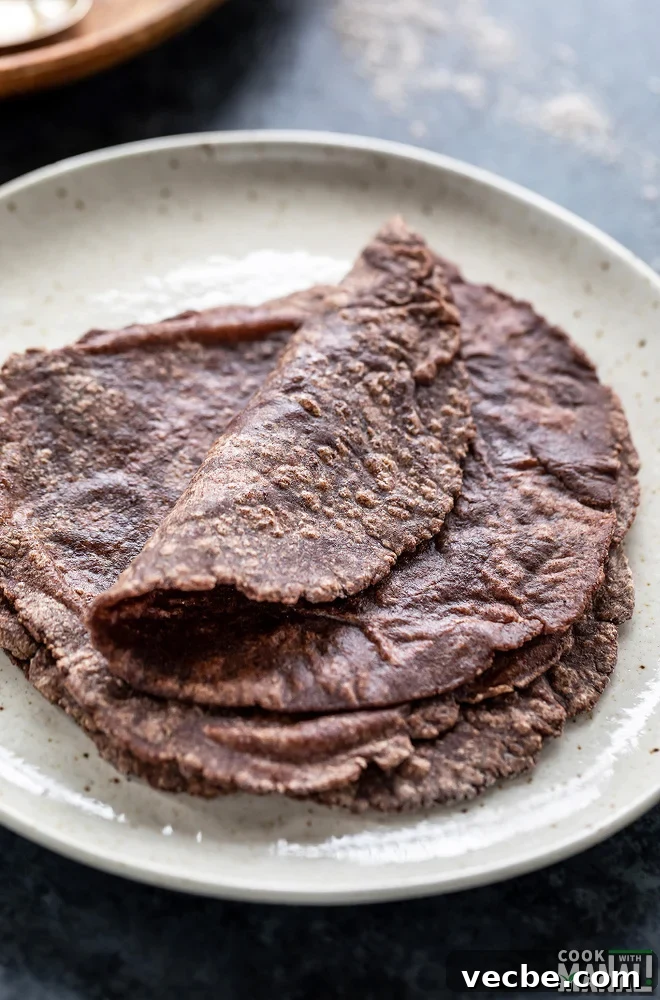
Plain Ragi Roti made with ragi flour (finger millet flour).
These rotis are rich in protein and calcium and are naturally gluten-free. They are also commonly called nachni roti.
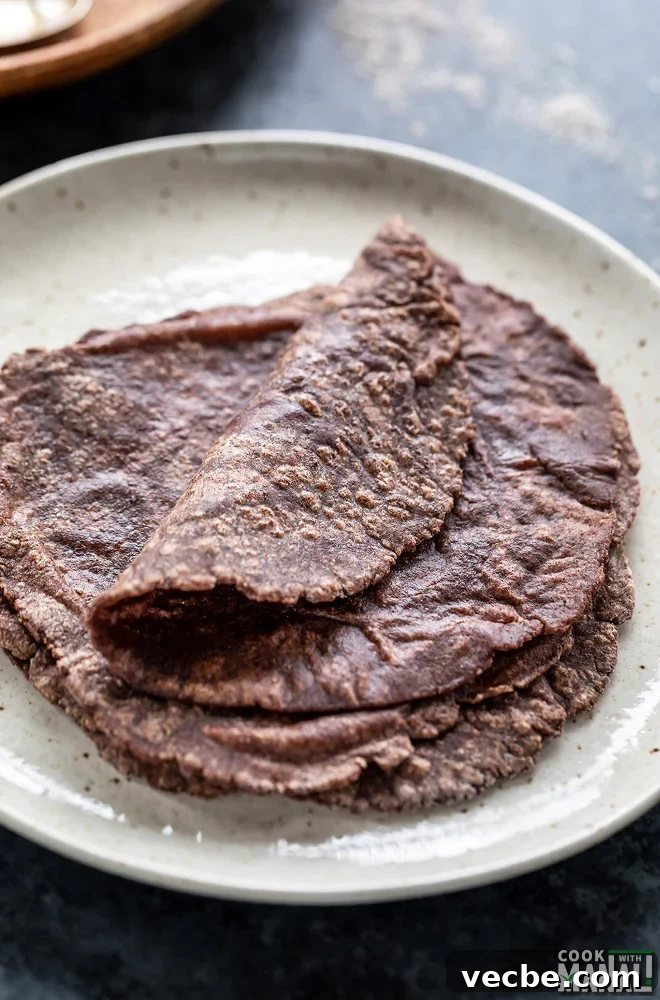
Growing up in North India, our daily meals were mostly wheat and rice. In the 1990s it was common to eat what families were used to cooking, so I wasn’t exposed to many other grains. Today, diets have changed: people are more health conscious and explore a wider range of grains, especially millets.
Millets have become popular for good reasons. They are high in fiber, rich in nutrients and antioxidants, and offer several health benefits. Many millets are gluten-free, which has increased interest in them among people seeking gluten-free alternatives. Among millets, ragi (finger millet) has become one of my recent favorites. I’ve been using ragi flour in a range of recipes and find that ragi roti is a practical, nutritious replacement for regular wheat rotis.
Why Ragi Roti
Ragi rotis are a wholesome bread option that work well for a gluten-free diet. They are a good source of calcium, iron and plant-based protein. Regular consumption of ragi may also support healthy blood sugar levels, cholesterol management and weight control when included as part of a balanced diet.
These rotis are popular in regions like Karnataka and Maharashtra, prepared in a few different styles. Some versions include chopped onion, chilies and herbs and are thicker, often served for breakfast. The plain ragi roti described here is thin and versatile, a great everyday option with dal and vegetable dishes.
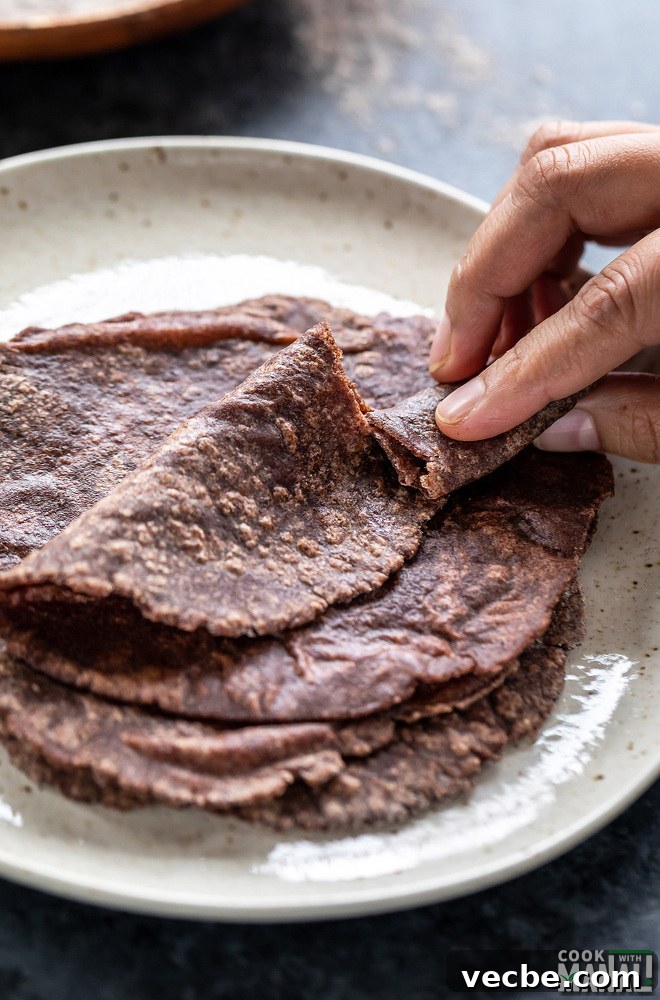
Taste and texture: Ragi rotis have an earthy, rustic flavor that might take a little getting used to. They tend to be drier than wheat rotis, so brushing ghee or vegan butter after cooking helps keep them soft and improves the mouthfeel. One advantage is they feel light on the stomach — you can often eat more without feeling heavy.
Rolling tips: Because ragi is gluten-free, the dough behaves differently from wheat. This recipe uses hot water to bind the flour, which makes the dough much easier to work with and roll. You can roll the rotis directly on a rolling board; if you have trouble, roll between sheets of parchment paper or a plastic sheet.
Ingredients
- 1/2 cup ragi flour (75 grams or finger millet flour)
- 1/2 cup water (120 ml / 4 oz) — hot, brought to a boil
- 1/2 teaspoon oil (optional)
- Pinch of salt (optional)
- Ghee or vegan butter for brushing (optional)
Serving Suggestions
Ragi rotis are best enjoyed hot, right after cooking. They dry out as they cool, especially if you don’t brush them with ghee or butter. Serve with dals, vegetable curries or spiced sabzis. These rotis pair well with simple dals like masoor dal and vegetable dishes such as aloo gobi.
Frequently Asked Questions
Is ragi roti gluten-free?
Yes. Made only with ragi flour, these rotis are naturally gluten-free.
Can I add wheat flour?
Yes. Mixing ragi with whole wheat (for example, 50% ragi and 50% atta) makes rolling easier, but the result will no longer be gluten-free.
Can I make them without oil?
Yes. Oil is optional. Many cooks add a small amount for pliability and flavor.
Are these rotis vegan?
Yes, if you skip ghee. Brushing ghee makes them non-vegan; use vegan butter as an alternative.
Method
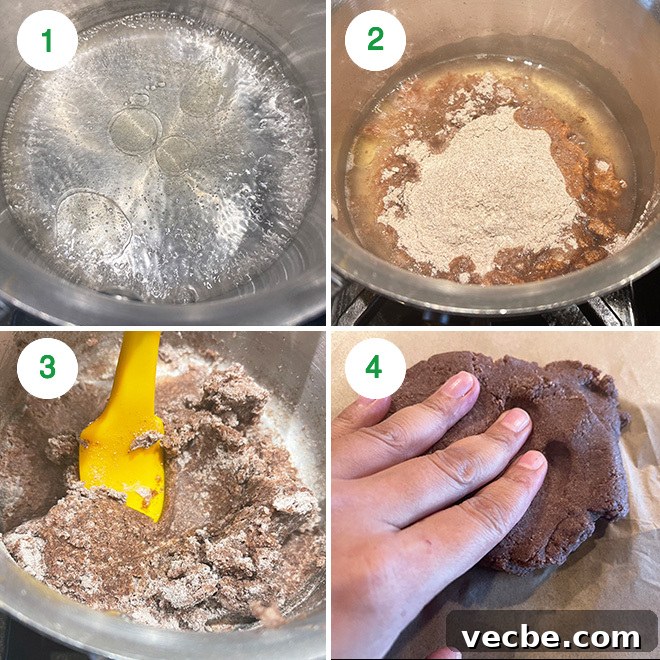
- Add the water to a pan and place it over medium-high heat. Add oil and a pinch of salt, then bring to a full boil.
- As soon as the water boils, remove the pan from heat and quickly add the ragi flour. Mix immediately with a spatula. The dough will feel stiff at first — keep stirring until it comes together.
- Transfer the mixture to a sheet of parchment paper and mix well. If the dough is hot, use the paper edges to protect your hands. Since there’s no gluten, you don’t need extensive kneading — just combine everything evenly.
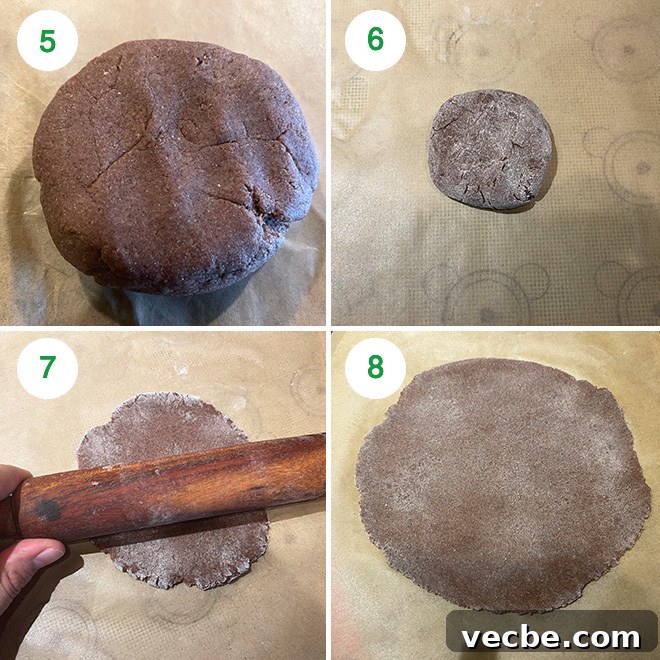
- Let the dough cool for about 10 minutes. Divide into four equal portions (about 42 g each). Roll each portion into a smooth ball, flatten slightly and dust with ragi flour.
- Using a rolling pin, roll each ball into a thin circle about 5–6 inches in diameter. You can roll on parchment or a rolling board. If the dough tears, roll between two sheets of parchment.
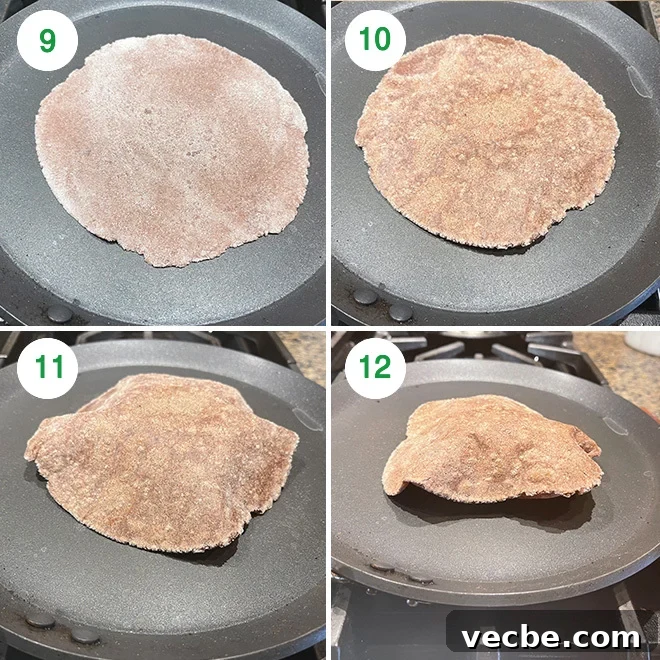
- Heat a tawa or skillet on medium-high. Place the rolled roti on the hot surface and cook about 30–40 seconds on the first side, then flip and cook the other side.
- Flip again and press gently with a paper towel or cloth so the roti puffs. Optionally finish directly over the flame for a few seconds, like a phulka. Brush with ghee or vegan butter if desired and serve immediately with your favorite curry or dal.
Notes
- Ragi rotis are best enjoyed immediately—serve them hot. They become drier as they cool.
- Brush with ghee or vegan butter before serving to keep them soft and moist.
- If the dough is too crumbly, slightly warm water and a little extra oil can help bind it.
Nutrition (approx. per roti)
Calories: 60 kcal • Carbohydrates: 11 g • Protein: 2 g • Fat: 1 g • Fiber: 1 g • Iron and calcium present in modest amounts
Additional Info
Course: Breads
Cuisine: Indian
Prep Time: 10 mins • Cook Time: 10 mins • Total Time: 20 mins
Servings: 4 rotis