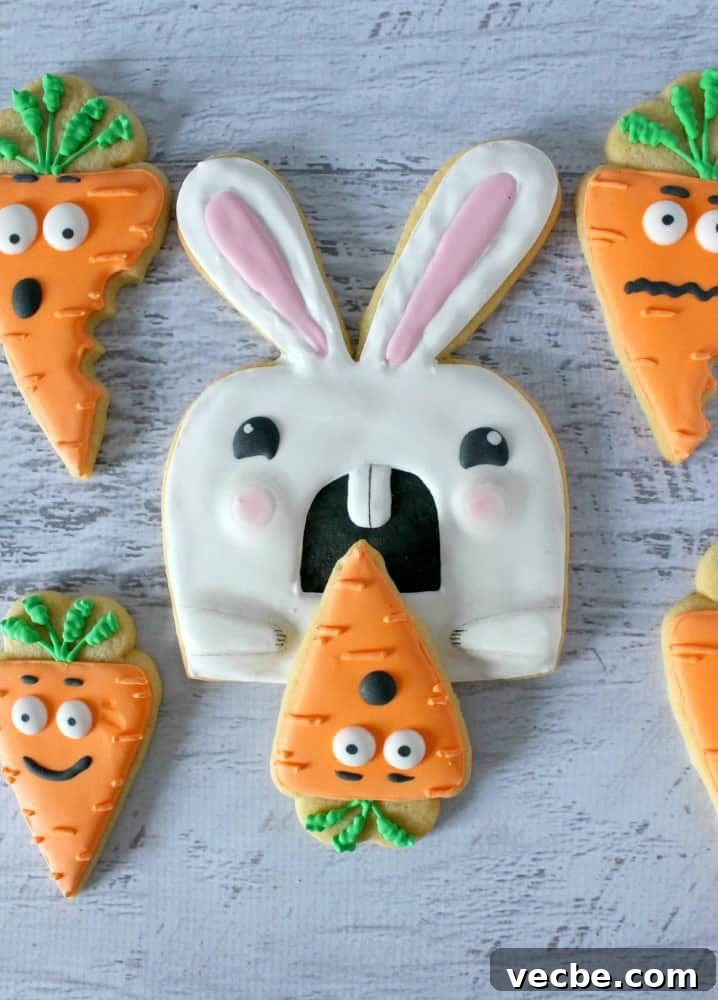
No matter which holiday is on the calendar, I always find a reason to make a batch of playful decorated cookies. Easter is especially perfect for colorful, character-style treats, and these killer bunny cookies with nervous little carrots are a fun twist on the usual spring dessert table. They are silly, expressive, and just a little unexpected, which makes them a great Easter cookie decorating project for anyone who enjoys royal icing designs with personality.
These Easter bunny and carrot cookies were inspired by a mix of holiday fun, cute anime-style expressions, and the idea of making the carrots look like they are trying very hard not to become bunny snacks. The designs use basic sugar cookies, royal icing, food gel coloring, and a few simple decorating techniques. You do not need a special cutter for every shape, either. If you do not have the exact cookie cutters, you can make simple templates and cut the dough by hand.
Killer Bunny Cookies
Supplies
Cookies
Royal icing
Food gel coloring in orange, green, pink, and black
Piping bags
A clean brush
Toothpicks or wooden skewers
Begin with baked and completely cooled cookies. A simple sugar cookie works well because it holds its shape and gives you a smooth surface for decorating. If you do not have cutters for the bunny and carrot shapes, create your own templates from cardboard and use a small knife to cut around them. For the carrot tops, flower cutters can work well, and for the bite marks, a rounded cutter edge can help create the right shape. This cookie set has two main designs: the bold bunny and the expressive carrots. Start with the bunny cookies first.
Using a clean brush, paint a layer of thick black royal icing onto the area where the bunny’s mouth will be. This does not need to be perfectly neat because part of it will be covered with white icing later. The important thing is to make the black area wide enough so there are no empty gaps between the mouth and the white icing. Next, use white piping-consistency icing to outline the cookie, including the inside of the ears and the shape around the mouth. Once the outline is complete, fill the body with white flood icing and gently guide the icing into place with a toothpick if needed.
Let the white icing set for a short time before adding the cheeks and arms. While you wait, fill the center of the bunny ears with pink flood icing. Once the ears are filled, return to the white icing and add the arms, cheeks, and teeth. The goal is to add these details while the base icing is still soft enough to blend smoothly, but not so wet that everything sinks together completely. This helps create gentle dimension without making the cookie look too layered.
While the bunny cookies begin to dry, move on to the carrot cookies. These are much simpler but just as fun because the expressions give them character. Outline the carrot portion with orange piping icing, then fill the inside with orange flood icing. Use a toothpick or skewer to smooth the icing and pull it into the edges. For the green carrot tops, use icing with about a 20-second consistency. Pipe lines coming out from the top of each carrot, then add short zigzag lines over them to create a leafy, bushy look.
Once the carrots are resting, bring the bunny cookies back to your workspace. With black royal icing at a 20-second consistency, pipe the bunny eyes. While the black icing is still wet, add a small dot of white icing to each eye. This tiny highlight makes the eyes look more lively and gives the bunny a cartoon-style finish. Set the bunny cookies aside and allow them to dry until the icing is firm, which will take at least four hours.
After the carrot cookies have crusted over, begin adding their faces. Use white 20-second icing to pipe large dots for the eyes. While the white icing is still wet, add the black pupils directly on top. Once the eyes are in place, pipe mouths, eyebrows, and other small features to create a variety of expressions. You can make some carrots look worried, surprised, annoyed, or completely terrified. To finish them, use orange piping icing to add short lines along the carrot bodies for extra detail and texture.
When the bunny cookies are completely dry, add the final details. Use a small amount of brown or black food coloring to lightly shade around the arms and cheeks. This helps emphasize the dimension created by the extra icing. Add detail lines to the teeth and paws, and finish with a soft touch of pink on the cheeks. These small finishing touches make the Easter bunny cookies look more polished and expressive.
Allow all of the decorated cookies to dry fully before stacking, storing, or packaging. Royal icing needs enough time to harden so the details do not smudge. Once dry, these killer bunny and carrot cookies are ready for Easter baskets, dessert trays, cookie boxes, or a playful spring baking project.
Happy baking!